Build Crossy Road Replica Part-6

Next we will be adding vehicles to multiple lanes of road , before that you might seen that our vehicle collides with the player and outputs "Hit" even if they are not on the same lane , this is because one of our collider is little bit big compared to the original shape. for me it was the vehicle which caused the problem. if you don't have this problem you can skip this step.
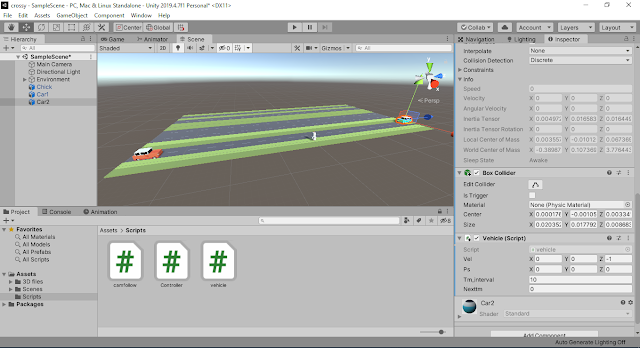
To fix that adjust the size value in the box collider attached to the vehicle , such that its width is less than the size of the lane. it is ok even if it is inside the vehicles body.Also you can click edit collider button in the collider component and some small green squares will appear on the faces of the collider , click and drag them to adjust the collider size.
{if you are not able to see the collider in the scene , it because you have hide it in the inspector , just click on the expand icon (marked in the figure) to show it.}

now if you try to play you will see that the problem has been fixed and does not collide if the player character is near to the vehicle.
So now we can add more vehicle.
For that ,similar to how we have create the previous vehicle , do the following steps:
- Drag the next 3d file of the vehicle to the scene
- Adjust the position ,rotation and scale if needed .it is not necessary that you need to place ,it on the next lane instead you can place it little bit behind the already existing car so that it feels like traffic on that lane , but make sure that when you add the script, velocity and time interval are set such that both vehicles doesn't collide{ for example ,you can set both of the same velocity and time interval for both ,so that they don't collide.}
- Next is to add a Rigidbody to it(make sure that new object is selected -> "Add component" in the inspector ->type"Rig"->select Rigidbody)
- Uncheck the use Gravity in the rigid body.
- Add Box collider (make sure that new object is selected -> "Add component" in the inspector ->type "box" ->Select Box Collider)
- Adjust the box collider size , as mentioned in the above section.
- Mark "Is trigger" in box collider
- Next add our script ( click add component in the inspector- > type the name of the script {mine was vechicle.cs } -> select it)
- Now set the time velocity , i paced my car such that it moves in opposite direction in the next lane so my velocity is (0,0,1)
-
- Now give value for time interval , i gave 10 , you can give random values to vehicles that it would feel like real traffic. Also you can add vehicle behind one another .


No comments: